Create schedules (new experience)
Learn about the different schedule types and how to create schedules for users, sites, and assets in the new Schedules experience via the web app.We currently have a legacy and a new experience with the Schedules feature.
This article covers the new Schedules experience. Please ensure you're in the new experience by using the toggle on the upper-left of the Schedules page.
What are schedules?
Schedules in SafetyCulture automate recurring work so you don’t have to manually track inspections or tasks. You can create a schedule once, and inspections are automatically created at the frequency you set, giving you a single place to monitor progress and ensure critical checks are completed on time.
You can create schedules to set up daily safety inspections for every site, assign a monthly asset audit to groups, or schedule seasonal maintenance so equipment is serviced ahead of time.
With schedules, you can:
Remove manual tracking of recurring work.
Standardize work across teams or locations.
Make sure critical checks are completed on time.
Support compliance by keeping required checks consistent.
Schedule types
In the new Schedules experience, you can create inspection schedules for users, sites, and assets. Each type controls who the schedule is assigned to and how it’s managed.
Users
This schedule type assigns schedules directly to specific groups or users. This type is ideal when certain users or groups are consistently responsible for completing inspections and is best used for schedules that apply to specific people, such as a monthly driver safety checklist for each driver or a weekly maintenance check for maintenance teams.
Sites
Site-based schedules allow you to assign an inspection to a single site, multiple sites, or a higher level in the site hierarchy. This type of schedule works best when inspections are tied to sites rather than individuals, especially in organizations with multiple sites.
When you create a schedule for multiple sites, it’s managed as one schedule with a sub-schedule for each selected site. For example, selecting 10,000 sites results in 10,000 sub-schedules under one schedule. Any updates to the main schedule automatically apply to all sub-schedules. As users or groups complete inspections, each sub-schedule remains associated with its site. You can also set each sub-schedule’s time zone to match its site’s time zone.
Assets
This schedule type allows to you assign schedules directly to assets so each scheduled inspection stays linked to what you're checking, not who is checking it. Use this type when inspections need to follow the asset’s lifecycle, especially for shared assets, assets that move between sites, or assets inspected by different users over time.
You can create a single schedule for up to 10,000 assets and manage them together under one schedule. When you update the schedule, the changes apply to all assigned assets. This makes it easier to scale asset inspections, keep them consistent, and maintain accurate records for large asset fleets.
If assets in your organization are only accessible by site membership, you can only create schedules for assets you've added and assets in a site you're a member of.
Each schedule supports only one type, which can’t be changed after it’s created.
Create a schedule
Select
 Schedules in the sidebar or select it in
  More.
More.Click
 Create schedule on the upper-right corner of the page.
Enter the schedule title and select a template from the dropdown list.
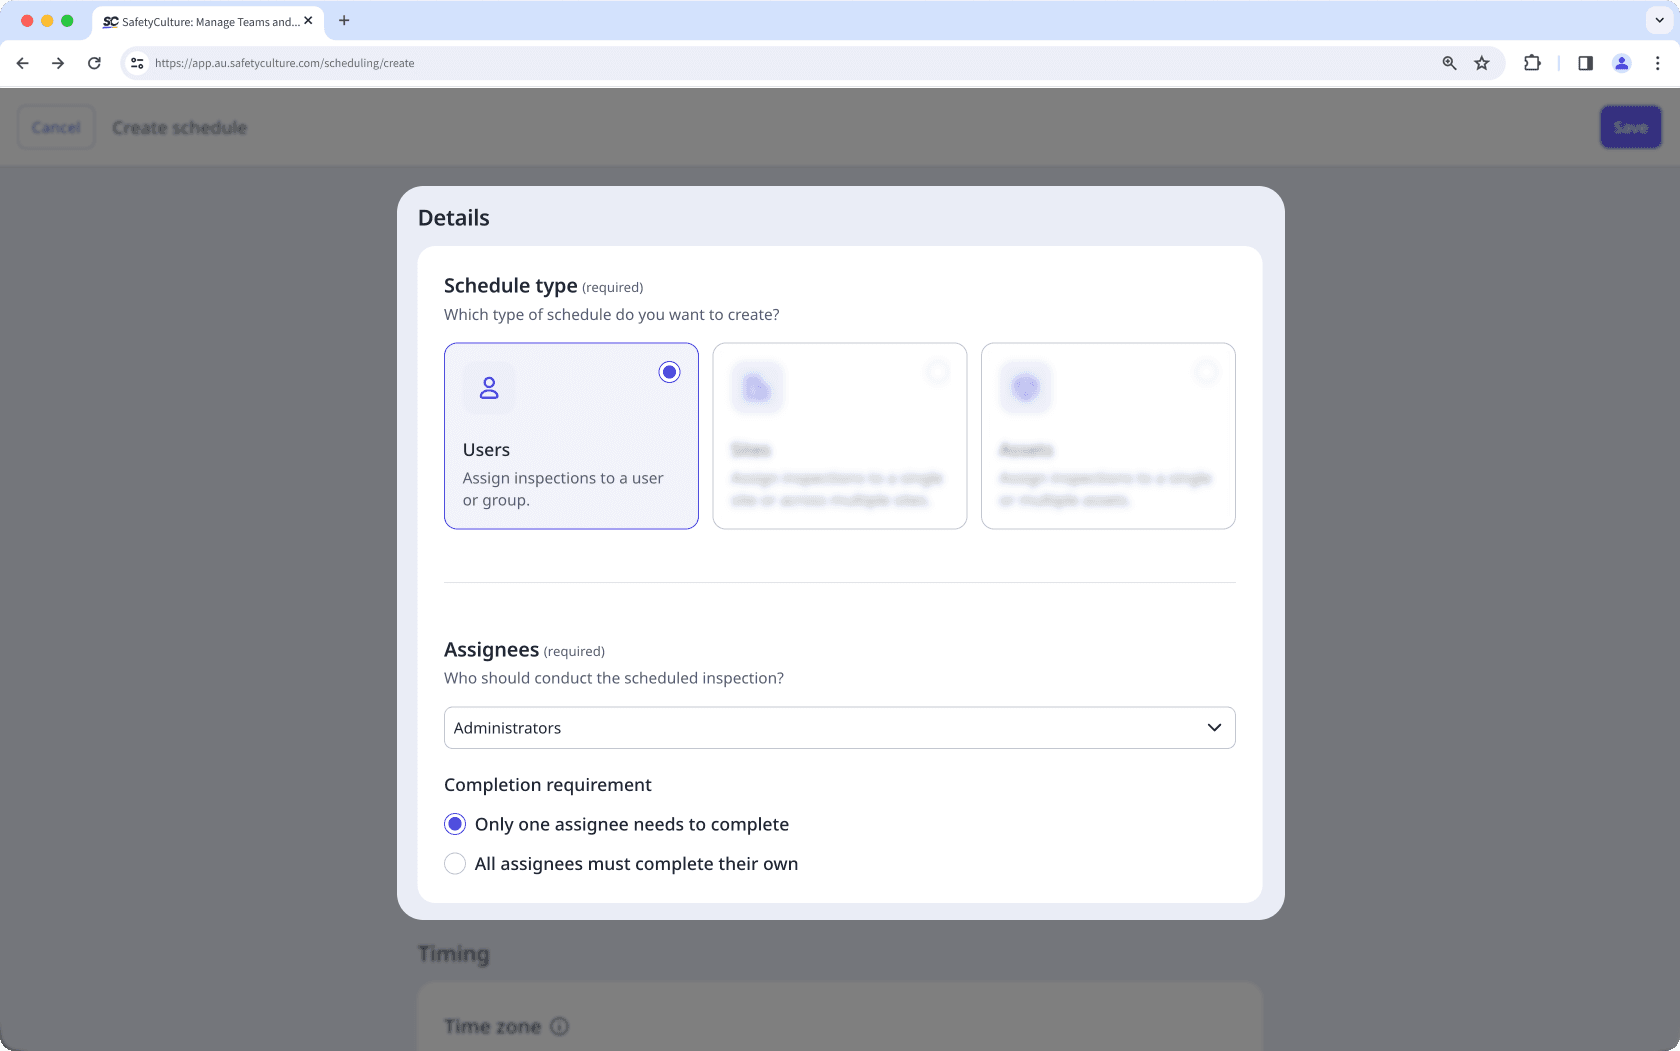
In the "Details" section, select
 Users as the schedule type.
Select the schedule's assignees from the dropdown list. If you select multiple users or a group, select one of the following completion requirements:
Only one assignee needs to complete: The schedule is marked as complete once any assignee completes the inspection.
All assignees must complete their own: The schedule is marked as complete only after every assignee completes their inspection.
Configure the timing settings accordingly.
Once you're ready, you can check your settings in the "Review" section.
Click Save
Select
Schedules in the sidebar or select it in More.Click
Create schedule on the upper-right corner of the page.Enter the schedule title and select a template from the dropdown list.
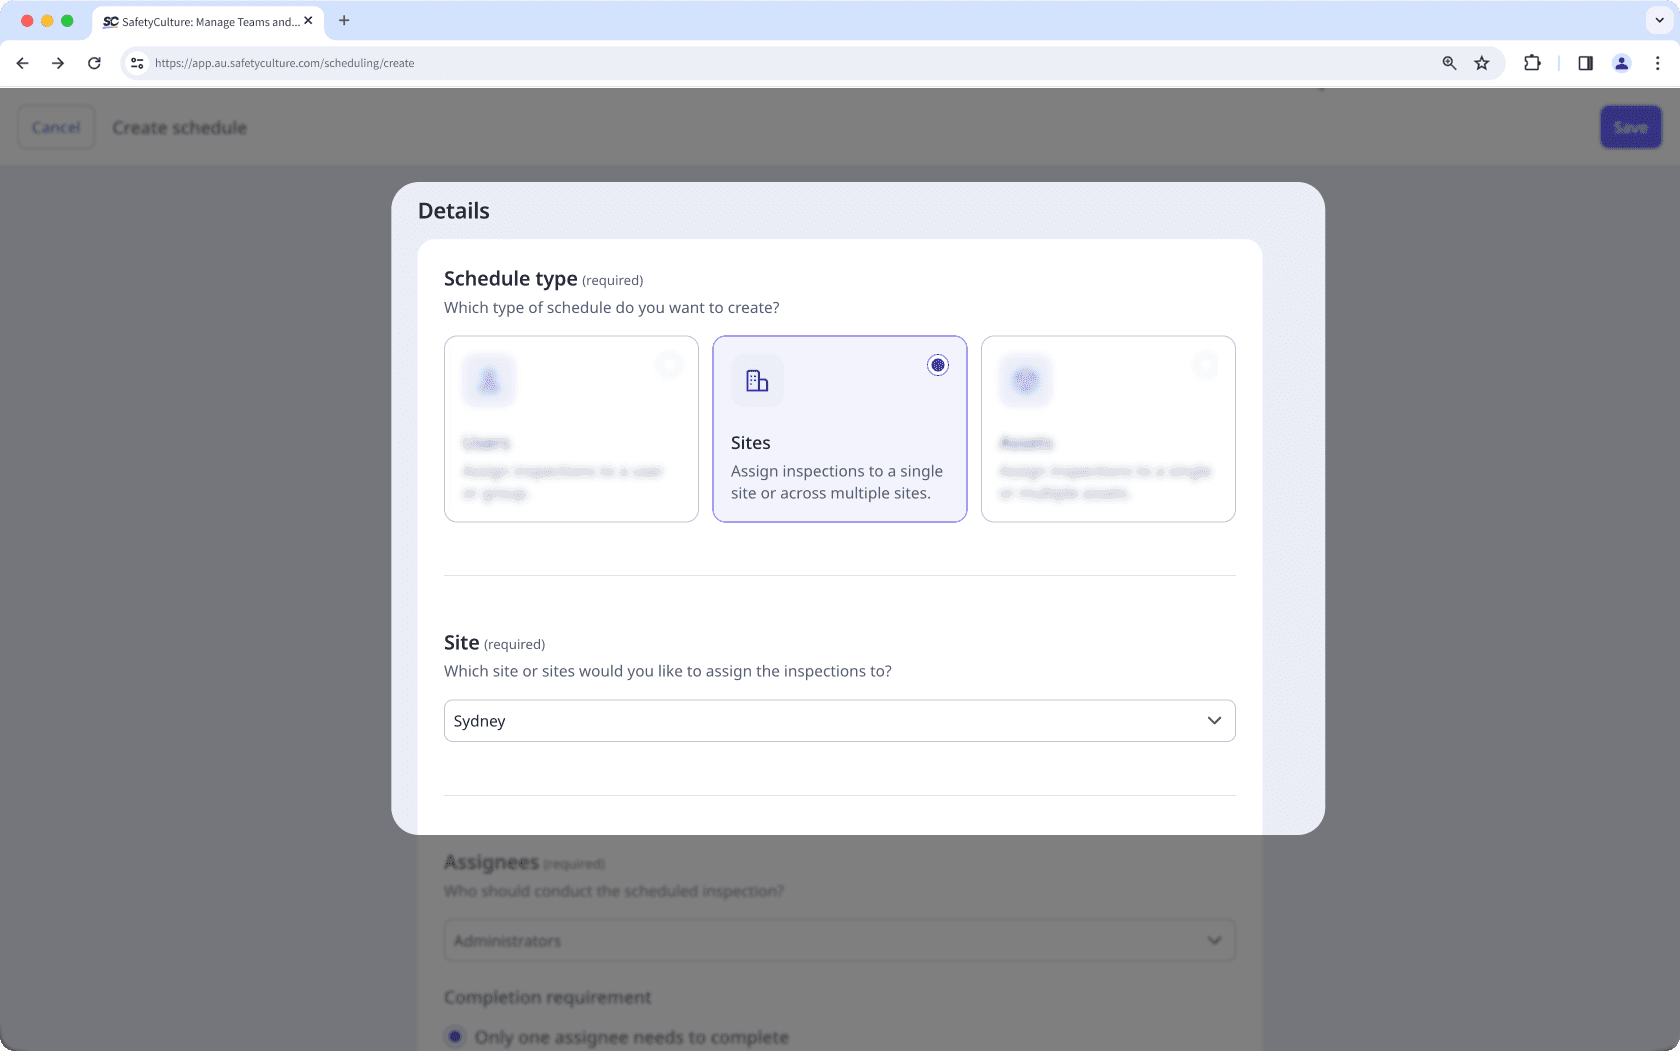
In the "Details" section, select
 Sites as the schedule type.
Select one or more sites from the dropdown list.
Select the schedule's assignees from the dropdown list. If you select multiple users or a group, select one of the following completion requirements:
Only one assignee needs to complete: The schedule is marked as complete once any assignee completes the inspection.
All assignees must complete their own: The schedule is marked as complete only after every assignee completes their inspection.
Configure the timing settings. To use the time zone set in each site profile, select
Site time zone. Each sub-schedule then follows that site’s time zone. If you selected multiple sites, make sure all selected sites have a time zone set before you use
Site time zone.
By default, the schedule uses the time zone of the selected site. To keep using this time zone, make sure all selected sites have a time zone set.
Once you're ready, you can check your settings in the "Review" section.
Click Save.
Select
Schedules in the sidebar or select it in More.Click
Create schedule on the upper-right corner of the page.Enter the schedule title and select a template with an asset question from the dropdown list.
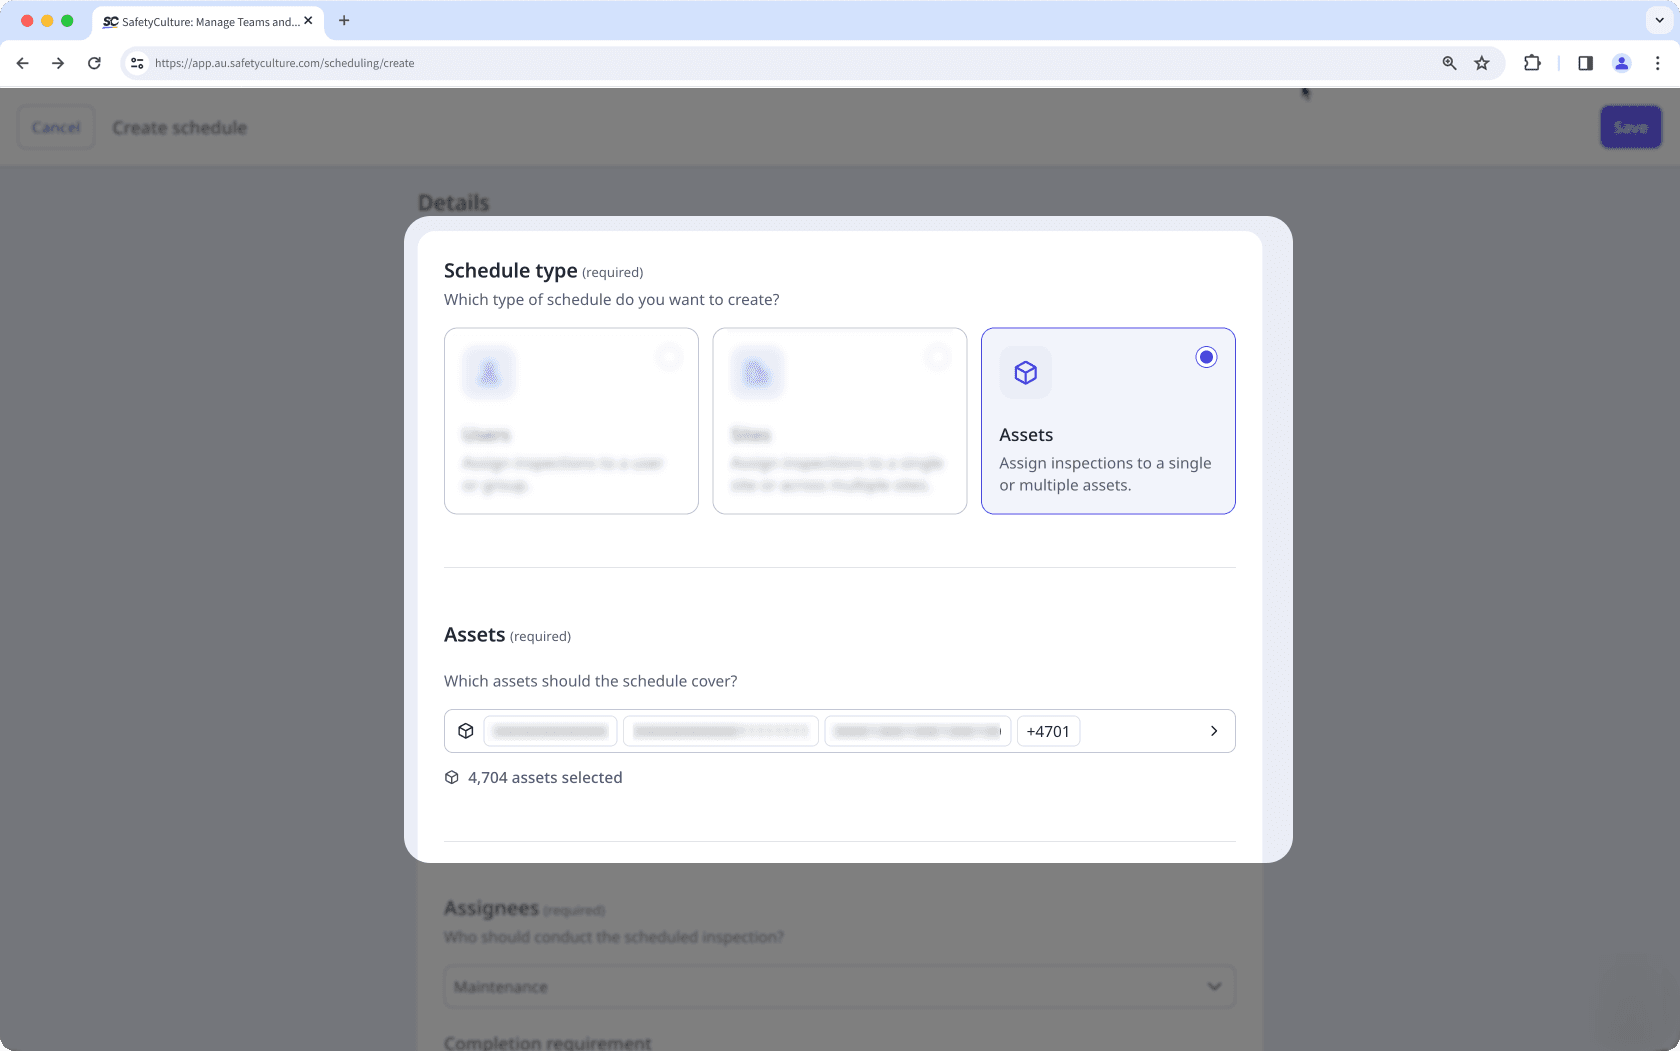
In the "Details" section, select
 Assets as the schedule type.
Select one or more assets from the dropdown list. You can select up to 10,000 assets at once.
Select the schedule's assignees from the dropdown list. If you select multiple users or a group, select one of the following completion requirements:
Only one assignee needs to complete: The schedule is marked as complete once any assignee completes the inspection.
All assignees must complete their own: The schedule is marked as complete only after every assignee completes their inspection.
Configure the timing settings. To use the time zone set in each asset's site profile, select
Asset's site time zone. Each sub-schedule then follows the time zone of the asset's site.If you select multiple assets, make sure all selected assets belong to a site with a time zone set before you use
Asset's site time zone.
Once you're ready, you can check your settings in the "Review" section.
Click Save.
Schedule fields
Overview section
Field | Description |
|---|---|
Title | The title of a schedule. It's best to describe the work that needs to be done, as this is what assignees will see on their Home page, Home screen, or schedule list as a schedule to complete. |
Template | The selected template for a schedule. This is the template assignees will use for their scheduled inspections. Please ensure all assignees have access to the template so they can complete their schedules without disruption. |
Details section
Field | Description |
|---|---|
Schedule type | The type of a schedule. This defines what the schedule is for and sets its details. You can create schedules for users, sites, or assets. |
Assignees | The assignees of a schedule. For any schedule type, you can assign a group or one or more users as assignees. • For site-based schedules, you can also use advanced access to assign users based on their site and group membership. • For asset-based schedules, you can also use advanced access to assign users who belong to the selected asset’s site and groups. |
Site | The selected sites for a schedule. You can assign it to a site level, like a region or area, that includes multiple sites. However, any new sites added under that site level after the schedule is created won’t automatically be assigned the schedule. To include them, edit the schedule, reselect the same site level, and save the change. |
When a schedule is assigned to multiple sites, only users who are added as direct members of those sites are included as assignees. Inherited site members aren’t included.
Timing section
Field | Description |
|---|---|
Time zone type | The selected time zone of a schedule. It can be based on the site, the asset's site, the time zone set in the creator's user profile, or a custom one. Based on the duration and frequency settings, each repeat will become available in this time zone. |
Duration | The repeat duration of a schedule, which defines how long each repeat is available. For example, if a repeat runs from Monday 9:00 AM to Friday 5:00 PM, then each repeat will last 4 days and 8 hours. |
Frequency | The frequency at which each repeat is made available. Some frequency options may be unavailable depending on the selected duration. For example, if each repeat lasts longer than one day, you can’t set the frequency to everyday or every weekday. |
Late completion | The toggle for whether to allow a schedule to be completed late. If this setting is turned on: • For repeating schedules, assignees can complete a repeat after the due date, up until the next repeat begins. • For one-off schedules, assignees have 14 days after the due date and time to complete it. Depending on the schedule's duration and frequency setting, late completion may not be possible even if it's turned on. For example, if each repeat lasts until the start of the next repeat, then there's no time in between for late completion. |
Frequently asked questions
You can only assign schedules to sites you’re a member of. Any sites you’re not a member of won’t appear in the list.
If Assets isn’t available as a schedule type, it’s usually because of one of the following reasons:
The template you selected doesn’t include an asset question. Try selecting a template that already has an asset question, or edit your template to add one.
You don’t have access to the Assets feature. Reach out to your administrator to request access.
Schedule frequency controls how often a scheduled inspection repeats. Most options follow simple frequencies, such as daily and weekly, and repeat exactly as you configure them. However, frequencies set to monthly may adjust slightly to stay aligned with calendar dates. This prevents repeats from overlapping, skipping, or behaving unexpectedly when months have different lengths.
For example, if you set a schedule to repeat monthly starting on the 1st, some months have 30 days, others 31, and February has 28 or 29. Instead of ending a repeat on a date that does not exist every month, the system runs each repeat until the next monthly cycle begins. A schedule that starts on January 1 at 9:00 am ends when the next repeat starts on February 1 at 9:00 am, even if you selected an end date like the 30th or 31st.
Was this page helpful?
Thank you for letting us know.